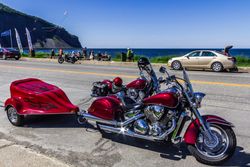
How to Tie Down a Motorcycle to a Trailer

If you have a motorcycle that you need to transport, using a trailer is ideal. These hitches provide a secure and spacious opportunity to move large items without damage or delay. To do this, however, there are certain steps you’ll need to take. The following guide outlines how to properly load and tie down your motorcycle to ensure safe transportation.
3 Steps to Tie Down a Motorcycle in a Trailer
1. Load the Bike
Getting your motorcycle onto the trailer can be cumbersome, but doing so properly is crucial to ensure you can adequately secure it. Use a loading ramp to drive the bike onto the hitch and place it safely in the center of the trailer.
2. Attach the Loops
 Before loading your bike, you should have installed a wheel chock into the trailer. This is where the ties connect with the hitch to keep the bike secure. Once the bike is on the trailer, attach the tie-downs to the bike’s handlebars. To do this, lean your bike to one side and gently secure the loops around the handlebar. Leave enough space on the loop that you can lean the bike to the other side to do the same for the opposing handlebar. Once both loops are placed, sit the bike upright and tighten the loops so that they grip the handles firmly.
3. Fasten the Brakes & Put Up the Kickstand
Next, attach tie-downs to the front and rear brakes of the bike. This will keep the pressure proportionate across the entire vehicle and prevent damage to the handlebars. Place the kickstand up to provide additional support to the bike throughout transportation.
If you need a trailer to help transport your motorcycle, turn to the professionals at Rumley Trailers in Browns Summit, NC. They’re proud to offer a broad range of products, including flatbeds, utility trailers, hitches, and jacks. Visit their website to learn more about what they do, and call (336) 669-0709 to speak with a team member today.
