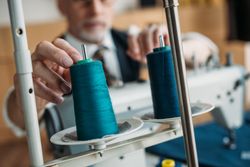
A Guide to Stitches for Spandex Fabric

A common misconception about sewing stretch fabrics is that you need a serger to complete the task. While this machine is helpful in a spandex project, a standard sewing machine has a variety of stitch options that will hold steady in the final product. Here’s everything you need to know about stretch stitches.
Stretch Percentage & Recovery
With any given stretch fabric, it will have an amount it can tolerate stretching before it loses its shape. To find the stretching abilities of the material you’re working with, divide the inches the fabric can stretch without distorting by its original length at rest. If a 10-inch piece of fabric can stretch six inches before it distorts, for example, then it has 60% stretch (6 inches / 10 inches = .6 = 60%).
The type of stitch you use for spandex fabrics is a particularly important choice because of the material’s stretch. Some stitches are more durable to distortion than others, which will pop at the seam with too much flexibility. When you use a stitch with a lot of give, though, you run the risk of the fabric stretching out and not returning to its original form. Consider the needs of your garment, and choose one of the stitches below based on your project requirements.
Types of Stretch Stitches
Zigzag
The zigzag stitch is the beginner’s stitch for sewing stretch fabrics. Almost any basic sewing machine has it in its repertoire, with length and width parameters that you can adjust. The zigzagging motion of this stitch allows the wearer of the final garment to move with the material without feeling constricted by the seams.
The default zigzag stitch typically has a 1.4mm length and 2.5mm width. This measurement is ideal for providing a lot of stretch, but it can cause the garment to eventually lose its shape since the stitch isn’t restricting its flexibility. For a stitch with a little more hold, try a longer, narrow zigzag, such as a 3.5mm-by-1.5mm length and width seam.
Stretch
Sometimes, a sewing machine will have a dedicated stretch stitch. Similar to a zigzag, this stitch offers room for the fabric to stretch through its back-and-forth motion. Instead of a symmetrical movement, though, the stretch stitch creates a lightning bolt line that slightly overlaps with the previous stitch. As a result, it is a more professional, straighter-line finish than a zigzag stitch, but it also makes the seam harder to rip if you mess up. If you have this option, test it out to see if you can handle it over a zigzag stitch.
Twin Needle
 The twin needle stitch is one you’ve likely seen as the hem on a cotton t-shirt. Named for the type of needle it requires, this stitch uses two parallel needles to sew clean hemlines. While your machine creates parallel straight stitches on top, the underside of the hem has a zigzagging bobbin thread that makes the garment flexible to accommodate for the stretch fabric.
To make the most of this hemming tactic, leave long tails at both ends of the hems, and set your machine to the longest stitch you can. Make sure that it can handle your double needle, as some older sewing machines can’t stitch with ones that have a wider width between the two needles. To avoid any puckering, tug at the stitching every couple inches that you sew.
Overcast
Decades ago, the key to finishing edges was a two-step, timely process involving a zigzag stitch reinforced by a straight stitch at the base. Now, sewing machines have the overcast stitch setting to save you the time and effort. The threaded needle sews a wide stitch that ventures to the edge of the fabric, which finishes the edge and provides flexibility. Meanwhile, a straight stitch offers more strength than the average zigzag. To bring this stitch to life, you’ll need to invest in an overcasting foot, which will help guide the fabric in a straight line as you feed it through your sewing machine.
Triple & Triple Zigzag
While different in design, the triple stitch and the triple zigzag stitch are designed to provide a durable seam. The former is a straight stitch in which the machine overlaps over a single stitch three times to reinforce the seam. This option is excellent for hemlines on spandex fabrics, as it gives a clean finish that can withstand the stretch that a standard straight stitch can’t.
A triple zigzag stitch, also known as a tricot stitch, is the type of seam you’ll find on a pair of underwear. The sewing machine creates this seam by sewing three tiny straight stitches in a zigzag pattern—basically dividing each zigzag into three stitches before changing direction. While it provides a lot of stretch when needed, like on the elastic waistband of your undergarments, the triple zigzag will falter if used for seams.
4-Thread Overlock
If you’re more of a pro when it comes to sewing spandex, you likely have invested in a serger. This industrial-grade sewing machine handles multiple threads at once to create complex seams in a fraction of the time. While it sews, a serger trims off excess fabric to leave clean edges with a looped thread finish. The 4-thread stitch gives you stretchiness and security from a popped seam, but only invest in a serger if you are an experienced sewist.
Tips for Sewing Stretch Fabric
Test Your Stitches
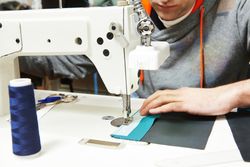 When trying any new stitch or sewing with any unfamiliar material, you must get a feel for the process before you get to work. Once you have cut out your sewing pattern, use the scraps to sample your sewing machine settings, like the stitch and the tension settings. See how the fabric interacts with the presser foot and adjust accordingly if the stitch begins to pucker the material. This simple step will help you figure out which stitch works for your project without having to pull out the seam ripper unnecessarily.
Use a Ballpoint Needle
If you’re new to sewing stretch fabrics, the cardinal rule of this material is to use a ballpoint or stretch needle. Unlike a sharp-edged universal needle that you’re likely used to using, a ballpoint needle has a rounded, blunt edge that aims to sew in between the spandex fibers rather than breaking through them. This option eliminates damage to the spandex material, which can unravel if you break the fibers and force them to stretch. Switch out your standard sewing machine needle for a ballpoint needle, and make sure to test the fabric with it to ensure you have the right sized needle for the project.
Use the Presser Foot Gently
The presser foot holds the fabric in place as the machine sews a stitch. When sewing different types of stitches, though, your machine’s original presser foot it came with may not do the job. For a zigzag stitch, you’ll need a presser foot with an oval-shaped hole, which allows the needle to shift back-and-forth. When you try to do the same with a presser foot for a straight stitch, you’ll inevitably break a needle.
In addition to the type of presser foot to use, you need to keep track of how it interacts with your stretch fabric. If you put too much pressure on this tool, it will stretch the spandex material as you guide the garment through the machine. Loosen the foot a little bit, and check how it works on a piece of scrap fabric before you unnecessarily stretch out your cut-out sewing pattern.
When your project calls for stretch fabric, turn to Spandex House for a vast selection of choices to fit your needs. Based in Manhattan, NY, this Garment District wholesale fabric supplier can help you bring to life any project big or small. For more information and to order samples, visit their website, or give them a call today at (212) 354-6711.
