How to Paint or Stain a Wood Fence

Painting or staining a wood fence not only makes it more attractive, but it also helps it last for many years to come. Taking the right approach is key in this case, especially if it's your first time undertaking the task.
What You’ll Need to Get Started
As with any DIY project, the first step is to gather the necessary materials. The better your painting implements, the better your fence will look when all is said and done, so don’t be afraid to invest in a quality brush and paint/stain product. When in search of paint, choose a brand that is intended for outdoor fixtures. These paints will hold up better against a multitude of weather conditions, including sun exposure.
Prep & Prime Your Wood Fence
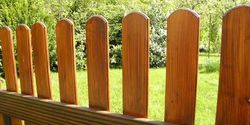 A washcloth and warm water are usually sufficient for cleaning your fence, but you can also use a broom to clear off dust or debris. After cleaning, don’t begin the paint or stain process until the fence is completely dry; this way, you won’t have to worry about mold growth.
A smooth fence surface is best, so sand down any rough spots. Finally, if you’re painting the fence, apply a primer first and allow it ample time to dry before painting. You can skip the primer if you’re staining the fence.
Update as Necessary
You’ll want to update the paint or stain every so often to ensure your wood fence remains protected. Every two to three years is the general rule, but if you live in a rainy climate, you might want to paint it more often. While paints and stains ward off water damage, they do lose their effectiveness over time.
Of course, your wood fence will need to be replaced eventually. When that happens, Wood Link Fence Co is here to lend a hand. These fence installers provide the benefit of more than four decades of experience serving residents in Columbia, MO. They can also help you design your fencing if you’re unsure and provide service to both residential and commercial customers. Call (573) 474-5115 today to discuss your options or learn more about their services online.
