Drywall Repair on Texture Ceilings

If you have a home with textured ceilings, you need to know how to keep them in optimal condition. If it becomes damaged, knowing the proper way to repair it is crucial. The drywall installation professionals at J&M Works in Lewis Center, OH, understand how important this information is, which is why below, they outlined a helpful guide to walk you through the repair process.
4 Steps to Repairing Textured Ceilings
1. Patching the Damaged Area
Before you can begin repairing the aesthetic appearance of the ceiling, you need to ensure the foundation is in good condition. To patch the drywall, cut out the damage area in a square or circular shape. Install backer boards flush to the back side of the drywall in order to fully support the edges (alternately, attach sister boards if patch is adjacent to ceiling joists). Cut a drywall patch slightly smaller than the space created, leaving maximum 1/8” gap between ceiling and patch. Install drywall tape, followed by 2-3 layers of mud (allow to fully dry between coats, then sand and apply next skim coat).
2. Matching the Texture
Once your base is in place, you’ll need to start adding the texture to cover the mesh. You want to ensure the texture you apply matches the one currently on your ceiling. To do this, you’ll need to focus on two primary elements: the thickness of the drywall, which can be determined using a tape measure, and the application used to texturize the ceiling.
3. Figuring Out the Application
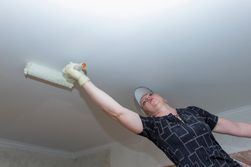 There are a few common applications used for textured ceilings. For example, there is a mottled texture. This application is created using a watered-down joint compound, which creates a liquid consistency. Another common application is the roller method, which involves using a paint roller to apply the drywall.
Determining which kind of texture was used can be difficult for a beginner, so check with a drywall repair technician to be sure. Once you know what kind you’re working with, test the application on a spare piece of wood to master the application. When you feel comfortable with the process, apply the texture to the ceiling.
4. Letting the Texture Dry
Once the texture application is finished, you’ll need to allow proper drying time. The length of time will depend on the application and thickness used, but on average, you should keep the area covered with plastic for at least a week before hanging any fixtures.
If you need help with drywall installations or repairs, talk to the professionals at J&M Works in Lewis Center, OH. With over a decade of experience handling all types of home repair projects, they have the skills and expertise needed to ensure a beautiful, sustainable finish on your textured ceiling. Visit their website for more information on their services and call (740) 358-6875 to schedule an appointment today.
About the Business

