3 Steps to Check If Your Tail Light is Out

Tail lights are the lights located at the rear end of your vehicle. They alert other drivers when you’re slowing down or braking and help increase visibility when driving at night. It’s important to know when a bulb is no longer functional, as driving with a broken, used tail light is not only dangerous, it can also earn you a ticket. To check the condition of your new or used tail lights, follow the steps listed below.
3 Steps for Checking Your Tail Light
1. Turn on the Car
 While the key should be in the ignition and the car turned on, check to ensure the vehicle is not in gear. If you have a friend in the car with you, they can check the rear lights. If you’re alone, you will have to get out yourself to check.
2. Engage the Brake Pedal
The only way to test the tail lights is to engage the brakes. Open the door to your vehicle and put one end of a broomstick or mop on the pedal. Push it down to engage the brakes and then lock the other end of the broom behind the seat so that it remains pushed down.
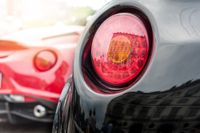
3. Get Out & Inspect the Lights
The last step is to walk around to the rear of your vehicle and inspect the brakes. You may have two or three lights depending on the year and make of your car. Typically, there is one brake light on each side of the bumper and additional light in the back window. If you’re unsure, check the car owner’s manual. If any of the lights are blown out, they will need to be replaced with a new or used tail light.
If you’re in the market for a used tail light, check out the selection at Stewart’s Used Auto Parts in Barkhamsted, CT. The premier auto shop offers a wide selection of products and services, everything from auto recycling to new and used auto parts. They also offer cash for old cars and trucks. Call (860) 379-7541 to ask about auto parts or visit their website to learn more about their cars and parts for sale.
