3 Tips for Using a Plunger Correctly

One of the most useful plumbing tools in your home is your plunger. Unfortunately, many people make mistakes when plunging that hamper their results. Here are three helpful tips for using a plunger correctly to clear clogged drains.
3 Important Plunger Tips to Follow
1. Keep Air in the Plunger Cup
When you place a plunger into a clogged sink or toilet, focus on keeping the air inside of the cup by inserting the plunger straight down against the drain. During plunging, trapped air provides the needed pressure to clear the clog. If air escapes while plunging and is replaced with water, remove the plunger and start again with trapped air.
2. Focus on the Air Seal
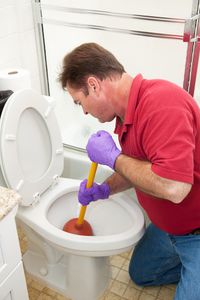 Keep the lips of the plunger flange around the clogged opening while you plunge. This seal helps to create air pressure, which will push debris through the line, freeing the clog. For an even tighter seal, purchase a fixture-specific plunger with a flange designed for your toilet’s opening.
3. Don’t Give Up
Move the plunger up and down against the clogged opening and plunge for 20 seconds at a time. You might want to set a timer on your phone to ensure you don’t stop early. Repeat the process and readjust your plunger as needed until the clog clears. If the clog isn't resolved after you’ve labored with the plunger for a while, you should contact a professional plumbing service to handle the issue.
If you have a clogged sink, toilet, or tub that you can’t fix with a plunger, call the team of specialists at Fast Rooter Plumbing. For more than 20 years, these experts have been helping residents throughout Oahu, HI, with clogged drains, hydro jetting, and pipe lining. Their trained plumbers are also skilled in inspection and use cameras to determine potential issues in your underground or sewer line. Schedule your next plumbing service today by sending them a note online or by calling (808) 734-4938.
