3 Essential Tips for Preparing Antique Cars for New Upholstery

When trying to restore or update an antique car, a trip to a professional upholsterer is often essential for an automotive enthusiast. Regardless of whether you choose to outsource the work to a professional or take care of it yourself, proper preparation is essential to get high-quality upholstery outcomes. Here’s what you can do to get your vehicle ready for this step.
3 Upholstery Preparation Tips for Antique Cars
1. Remove Smelly Materials
Antique cars tend to have a distinctive smell—and that’s not something you want carried over to your new upholstery. Because of this, it’s strongly recommended that you remove any materials that retain this odor before completing upholstery work. Factory hardboard—and the tarring used to hold it in place—is one of the most common offenders.
2. Install Seals & Molding
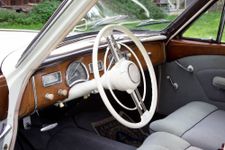 Doors, windows, trunk lids, and hoods should all be fully functional before upholstery work begins. Weather seals should be installed on the doors and bumpers, while felting, garnish moldings, and window seals should be completed and primed. Moldings may or may not need to be painted in advance, depending on whether you plan on color-matching with the new upholstery.
3. Check Components
Upholstery is one of the final steps of restoring an antique car, and this means you should check that all other components are working like they should. Pay special attention to the vehicle’s electrical connections, heater hoses, and AC lines. This will ensure that loose wiring or a fluid leak won’t ruin the upholstery work.
With thorough preparation, antique cars can get lasting, quality results from their upholstery work. For automotive enthusiasts wanting to see how such results are achieved, few events are better than the Charlotte AutoFair in North Carolina. Held twice a year, this car trade show is the perfect place to check out collector cars and restorative vendors. To learn more about this event, visit them online or call (704) 841-1990.
About the Business

