How To Professionally Sand Wooden Floors & Floorboard

18/03/2014 BY CHRISTINE 54 COMMENTS
Some of the most frequent questions we get asked are about how to sand wooden floors.

So, we’ve put together this (very long) list of Q&As that will hopefully give you a hand and a good idea of what to expect if you’re considering doing the job yourself.
BEFORE YOU START
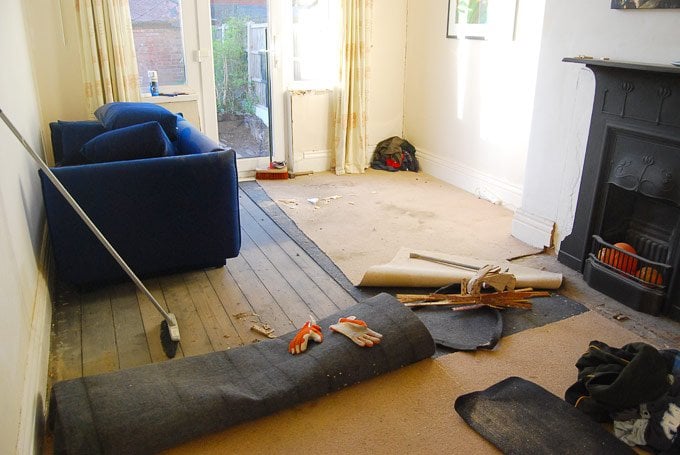
WHERE DO I BEGIN?After completely emptying your room, remove any old floor coverings, nails and anything else that is attached to the floor and then give everything a good vacuum and clean. Basically, you want an empty clean surface to start working from.
DOES THE ROOM HAVE TO BE COMPLETELY EMPTY?Ideally – yes. The big drum sander that you’ll be using is really bulky and you really need space to move around the room easily. Having said that, when we sanded our dining room floor, we did leave our blue sofa and sideboard in the room because we just didn’t have anywhere else to put them. We ended up completely sanding one-half of the room and then moved the sofa over to sand the other half of the room. Of course, it wasn’t ideal, but it wasn’t awful, either.
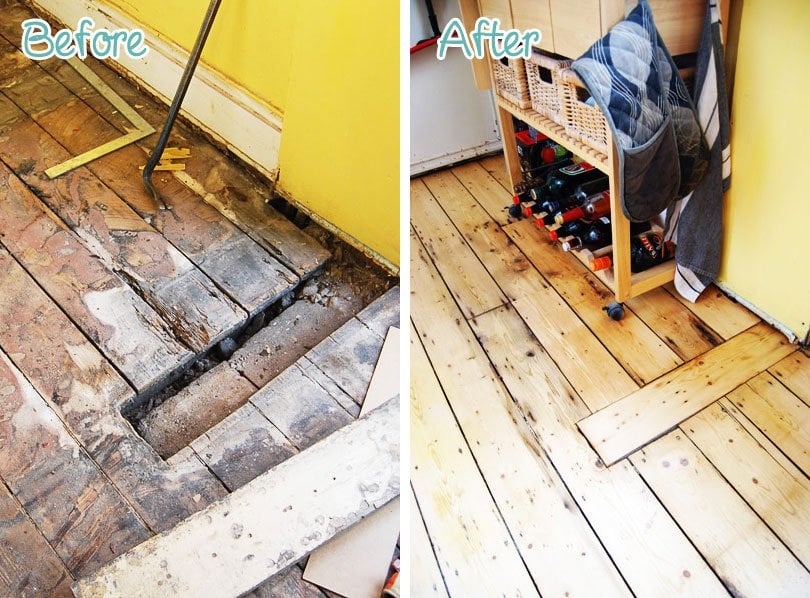
Probably. Don’t get me wrong, if all of your floorboards are rotten and you have big holes everywhere, even the best sanding job isn’t going to make it look good.
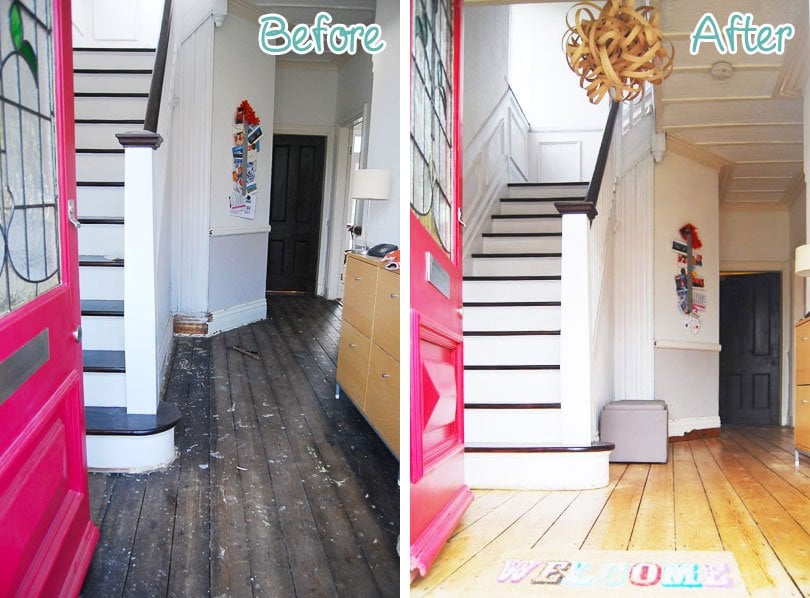
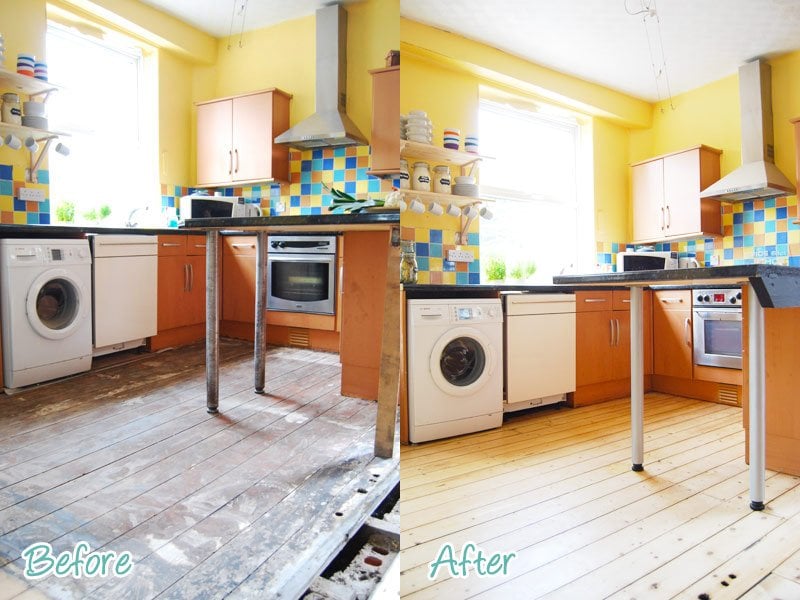
Having said that, our kitchen floor looked absolutely awful, but after replacing a few of the rotten floorboards and giving everything a sand, it’s actually not turned out too bad.
Basically, you will need a drum sander and an edging sander. The hire shop will give you what you need and show you how to use the machines. No need to worry though as it was really simple!
ARE THERE ANY OTHER TOOLS OR EQUIPMENT THAT I’LL NEED?Hammer, nail punch, sandpaper, vacuum cleaner oh, and lots of room in your bin!
WHAT PROTECTIVE EQUIPMENT WILL I NEED?Dust masks, ear protection, sensible shoes.
IS THERE ANYTHING ELSE I HAVE TO PREPARE?Make sure your floor is completely flat and nail free. Every guide states that you should punch everynail of your floorboards into the wood so that it’s about 2mm under the surface.
DO I REALLY HAVE TO PUNCH DOWN EVERY NAIL BEFORE SANDING?In our opinion – no. Of course, you can’t have any nails protruding out of the surface, but we didn’t find it necessary to punch down the nails at all. I should point out, that this isn’t recommended and you will definitely have to be careful with your sander, as it can catch on a nail and rip your sandpaper or worse, damage the machine. The floor sanding company that tackled our living room floor also didn’t bother with this step.
SANDING
HOW DO I ACTUALLY SAND THE FLOOR?You will have to sand around the edges of the room with the edging sander and sand the rest of the floor with the large drum sander. If you have really, really uneven floorboards, you could start by sanding (with the large drum sander) diagonally to the floorboards to even things out and then move on to sanding in the direction of the boards. As a general rule, you always sand with the grain of the wood.
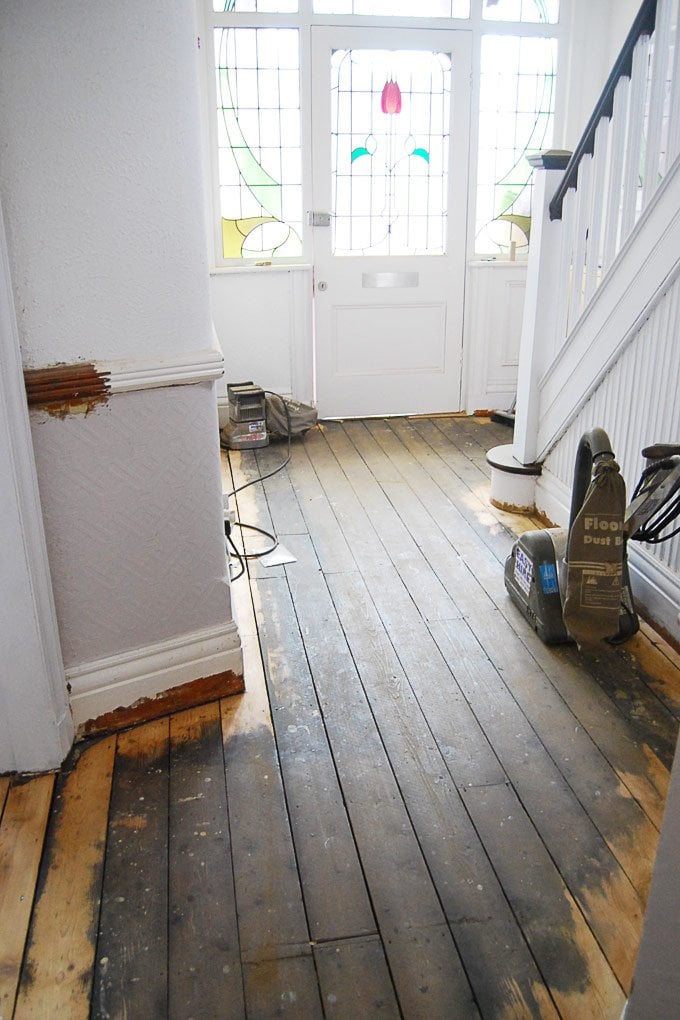
We used 24 grit, 40 grit, 80 grit and 120 grit. Start sanding the floor with some really coarse sandpaper (we started with 24 grit paper). After removing most of the old layers of varnish, stain and grime, you can move on the less coarse paper.
IF I’VE REMOVED ALL OF THE DIRT AND GRIME WITH THE COARSE PAPER, WHY DO I HAVE TO BOTHER SANDING IT AGAIN WITH FINER PAPER?The really coarse paper will really eat into the floorboards and leave a very rough surface. With each sand with finer paper, you are removing and smoothing out the roughness of the wood. Don’t skip the really fine paper either. It really does make your floor much smoother, more professional and easier to maintain.
HOW MUCH SANDPAPER WILL I NEED TO SAND A FLOOR?Switch your sandpaper regularly – it’s definitely something we learned the hard way. The more frequently you switch the paper, the faster you’ll be able to sand the floors. Don’t underestimate the amount of paper you will need, either. When hiring the machine you buy the paper, too, but usually, you can return any surplus. You don’t want to run out of paper, especially if you’re working at the weekend and can’t get hold of more! For the large drum sander, we used about 12 sheets of 24 grit, 8 sheets of 40 grit paper, 8 sheets of 80 grit paper and 5 sheets of 120 grit paper. For the edging sander, we used about the same amount of each grit again.
CAN I SAND FLOORBOARDS WITH A HAND SANDER?No. Believe me, I tried. It would also end up being a false economy, as even if you don’t count the impossible amount of time it would take to do, you would probably also end up going through such a ridiculous amount of sandpaper that it may even end up costing you more than to hire a machine!
FLOOR FINISHING – VARNISHING, STAINING & OILING
WHAT KIND OF FLOOR FINISH SHOULD I CHOOSE?We chose to finish the floor with a clear satin varnish. Alternatively, you could decide to oil your floors.
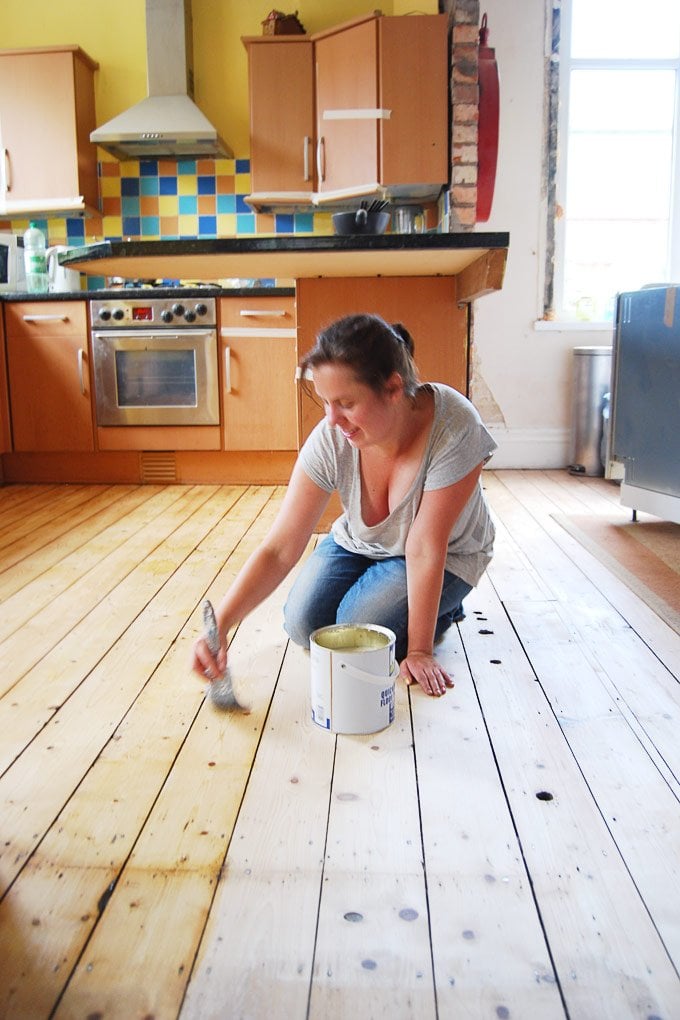
HOW DO I VARNISH A FLOOR?This couldn’t be easier to do. Start by making sure you’ve removed all dirt and dust from sanding before varnishing. We only used a brush (this is
 WHAT IF I WANT TO COLOUR MY FLOOR?
We’d recommend using a stain and then a clear varnish on top. We’ve seen a few floors where a coloured varnish has been used which over time inevitably wears away and gets the odd chip and scratch. As the colour chips away, any marks are then really visible. If you stain and then varnish the floor, for the most part only the varnish will wear away leaving any chips less visible.
WHAT KIND OF GLOSS LEVEL SHOULD I CHOOSE?As with all decorative decisions, the choice is yours. We decided to go with a satin finish, as we think that it has a slightly more contemporary look compared to a glossier surface. We also took a few more practical decisions into consideration, too. We were concerned about a possible glare from a shiny surface and any scratches and imperfections (there are lots of them) are also a lot less visible on less shiny surfaces.
WHAT KIND OF VARNISH SHOULD I USE TO VARNISH A FLOOR?We used Granwax Aquathane varnish in satin. It’s what’s been used on all of our floors and is the same product that the professional floor sanding company used, too. We love it because it’s really easy to apply, dries quickly and had a great natural looking finish that doesn’t have that plastic-y look that you will see quite often.
HOW LONG SHOULD I WAIT BEFORE VARNISHING A FLOOR?Your floor is essentially unprotected after sanding. You should aim to get it varnished (or oiled) as soon as possible.
HOW MANY COATS OF VARNISH SHOULD I APPLY?The manufacturer’s guidelines will vary, but as a rough guide around 3 coats for normal traffic areas and an extra fourth coat for high traffic hallways like hallways is what you should be aiming for.
HOW LONG BEFORE I CAN MOVE MY FURNITURE BACK INTO THE ROOM?You shouldn’t move your furniture back till the varnished is entirely cured, which (depending on your varnish) can take up to 14 days! In most cases this obviously isn’t possible and we only waited about 48 hours for most of our furniture.
TIMESCALES
HOW LONG DOES IT TAKE TO SAND A ROOM?Don’t underestimate the amount of time it will take to sand your floor. The professional floor sander guy took around 2-3 hours to sand our living room floor – it took us a lot longer! In numbers, it took the two of us about 25 hours to sand 4 rooms (totaling at about 43m²). If you had just one room the same size, it probably wouldn’t take as long, as you’d have fewer edges and less maneuvering to do.
HOW LONG DOES IT TAKE TO VARNISH A FLOOR?Varnishing the floor was surprisingly quick. I’d say it didn’t take us much longer than an hour to varnish all rooms once.
COST
HOW MUCH WILL IT COST?We paid about £250 to have our living room floor (about 15m²) sanded. That works out at around £17/m². As a DIY job, the cost will depend on how many rooms you are doing in one go.
This is the cost breakdown of our epic floor sanding effort (dining room, hallway, first floor landing & guest bedroom):
- The machine hire cost – Weekend hire floor sander and edge sander (Friday 14:00 – Monday 12:00) – £52.50 (special half price offer)
- Large sanding sheets – £69.60
- Small sanding disks for edging sander – £46.80
- Varnish (we still had some left over from our staircase restoration, so only needed one extra can) – £40.00
- Dust Masks – £4.18
Total: £213.08 – That works out at around £5/m².
MAINTENANCE
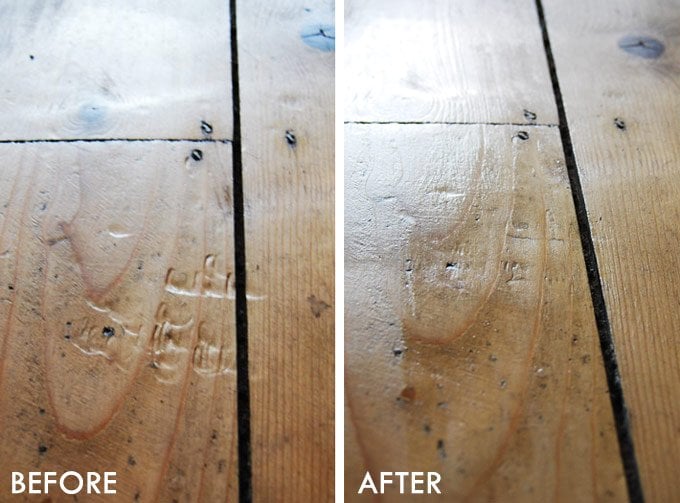
HOW DOES THE FLOOR HOLD UP? ARE THERE MANY DENTS AND SCRATCHES?Our floor is holding up really well. In general, we don’t really wear shoes in the house, which is probably something that helps keeping the floor looking good. Of course, there are a few dents and scratches, but they kind of add character to the floor and because we chose a clear varnish they are almost not visible. If you have a dent that really bothers you, you can check out our guide to fixing ithere.
HOW DO I MAINTAIN THE FLOOR?
We just give it a regular vacuum and wipe down with a damp cloth. Really nothing special.
HOW LONG WILL IT LAST?As a general rule, you should think about refinishing you floors when you redecorate. Refinishing it doesn’t mean that you have to go to all of the sanding efforts again. It’s more a case of lightly sanding the surface and revarnishing it.
ANYTHING ELSE?
WILL IT BE DUSTY?Yes. It gets everywhere. Try and seal off the room you are working is as much as possible. On a positive note, the dust is really light and easy to vacuum and clean away.
IS IT A DIY JOB OR WOULD I BE BETTER OFF GETTING A PROFESSIONAL TO DO IT?It’s totally DIY-able, but be warned, it’s really, really hard work. The sanders are really heavy and I just wouldn’t have been able to lift the machine out of the car and into the house on my own.
IS THERE REALLY A DIFFERENCE BETWEEN A PROFESSIONALLY SANDED FLOOR AND A DIY SANDED FLOOR?Having had some of our floors professionally done and having done some by ourselves, we can happily say that there is absolutely no difference.
The gaps between our floorboards aren’t very large and we didn’t bother filling them. We have howeverinsulated under our floors and also insulated the gaps between the skirting boards and floors.
SHOULD I DECORATE THE ROOM BEFORE OR AFTER SANDING?Really it’s up to you. We’d recommend doing any of the dirty work like stripping wallpaper and skimming before sanding the floor, other than that it really doesn’t matter. When sanding around the edges of the floor, you will inevitably knock your skirting boards, though, so finishing them off after sanding the floor is probably a good idea.
